For many individuals with mobility challenges, having the right equipment makes all the difference in maintaining independence, comfort, and dignity. Bariatric wheelchairs in Ireland are specifically engineered for individuals with larger body types. Unlike standard models, which may not provide the same level of support, bariatric wheelchairs are built with enhanced weight capacities, reinforced frames, and wider seating options. These features ensure greater safety, comfort, and mobility, empowering users to lead more independent and fulfilling lives.
Whether you require a wheelchair for day-to-day use, rehabilitation, or improved access to public spaces, bariatric wheelchairs are vital tools for ensuring inclusivity and accessibility. In this article, we’ll explore their features, benefits, maintenance needs, and how they compare to standard wheelchairs, along with practical tips for choosing the right model in Ireland.
Key Takeaways
-
Bariatric wheelchairs in Ireland support individuals with higher weight requirements, offering enhanced comfort, safety, and durability.
-
These models include reinforced frames, wider seating, and high-quality materials designed to withstand daily use.
-
Many customization options—such as seat width, armrests, and cushioning—allow users to tailor the wheelchair to their specific comfort needs.
-
Support services, including the Irish Wheelchair Association, provide assessments, advice on funding, and community-based assistance.
-
Bariatric wheelchairs help increase independence, social inclusion, and quality of life for users across Ireland.
Understanding Bariatric Wheelchairs
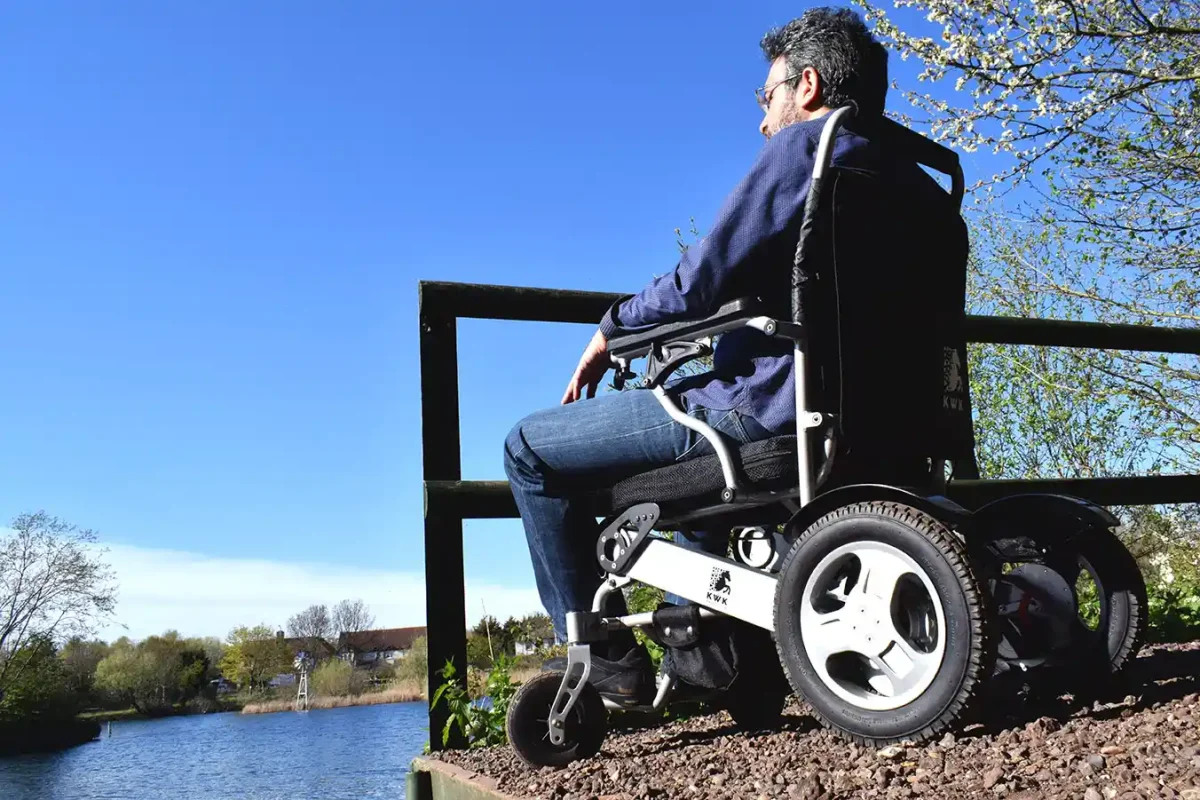
While the term bariatric often relates to medical treatments for obesity, when it refers to mobility aids, it signifies wheelchairs designed for higher weight capacities. For someone requiring additional mobility support, a standard wheelchair may feel restrictive, uncomfortable, or even unsafe. Bariatric wheelchairs solve this by being larger, sturdier, and more adaptable.
These chairs allow for safe transport, everyday living, and public mobility, ensuring users feel confident whether at home, in the community, or commuting to work. For example, if you regularly use public transport in Dublin, a bariatric wheelchair designed with extra width and stability may help you navigate buses and trains comfortably.
Most importantly, bariatric wheelchairs are about providing freedom, not limitation. They help restore independence and confidence for those struggling with mobility, creating more inclusive communities across Ireland.
Key Features of Bariatric Wheelchairs
The design differences between bariatric and standard wheelchairs may appear subtle, but they serve vital roles. Let’s explore the essential features that make bariatric wheelchairs unique.
1. Weight Capacity
One of the core distinctions is weight capacity. Where standard wheelchairs typically support weights of up to 250–300 lbs (110–136 kg), bariatric chairs can handle from 300 lbs to 1,000 lbs (136–450 kg), depending on the model.
Factors to consider include:
-
User Weight – Always select a model with extra capacity beyond your actual weight for long-term durability.
-
Daily Usage – If you plan to use it multiple hours daily, opt for one with a high buffer capacity.
-
Equipment Add-ons – Weight of cushions, accessories, and medical devices should also be considered.
2. Enhanced Stability
Stability is crucial in ensuring both safety and confidence. Bariatric wheelchairs often incorporate:
-
Reinforced wheelbases for better balance.
-
Anti-tip bars to prevent falls on inclines.
-
A lower centre of gravity to reduce tipping risks.
This is invaluable for users navigating uneven surfaces—whether it’s the cobblestones of Galway City or rural Irish roads.
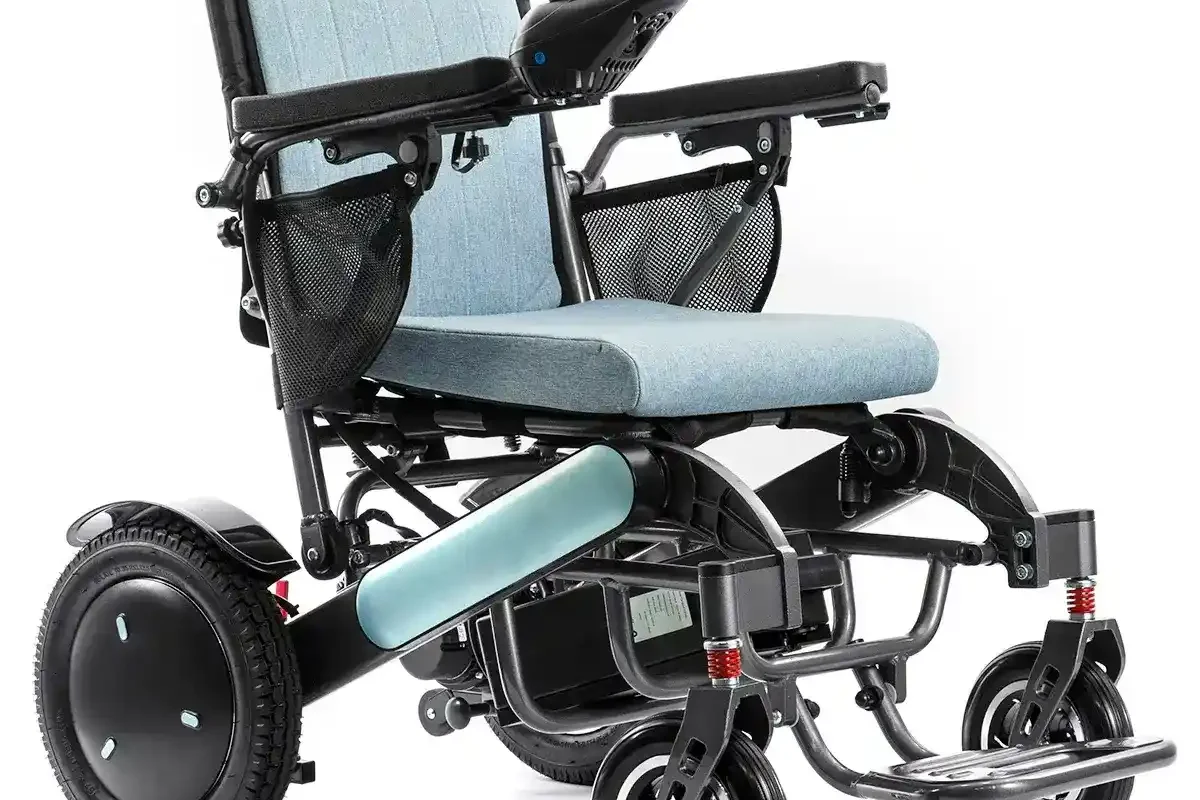
3. Comfort Customization
Comfort isn’t just about wider seats. Many bariatric wheelchairs offer full customization options, enabling users to set up chairs to their lifestyle needs. Options include:
-
Adjustable seat width and depth (essential for circulation and posture).
-
Elevating footrests for medical conditions such as swelling.
-
Different upholstery materials, from breathable fabrics to easy-clean vinyl.
-
Streamlined accessories like oxygen tank holders or storage pockets.
Much like choosing a mattress suited to your body, picking the right customization ensures you stay supported throughout the day.
Importance of Weight Capacity
Choosing a bariatric wheelchair with the correct weight capacity is not simply about avoiding breakage—it’s about guaranteeing safety and independence. A chair that is not rated correctly could compromise stability, increase wear-and-tear, and potentially lead to injury.
For instance, attempting to use a chair below your weight class can damage wheels, weaken the frame, or stress joints. On the flip side, selecting a model slightly above your actual weight ensures comfort, long lifespan, and added safety.
Frame Construction and Durability
When it comes to construction, durability is non-negotiable. Bariatric users often require equipment that withstands all-day use across different terrains. Many bariatric wheelchairs are built using:
-
Steel or aluminium alloy frames for maximum strength.
-
Powder-coated finishes for corrosion resistance—crucial in Ireland’s damp climate.
-
Double reinforced welds for joints, reducing structural risks.
-
Balanced weight distribution systems, making prolonged sitting more comfortable.
If you live in coastal areas like Cork or Donegal, corrosion resistance is especially vital to prevent rust from sea air.
Seat Width and Comfort Considerations
Finding the right seat width and cushioning system is central to comfort. Too narrow, and it restricts posture; too wide, and you may slide or strain during movement.
-
Optimal Seat Width: Measure your hip-to-hip span and add 1–2 inches.
-
Padding & Upholstery: Choose high-density foam cushions with breathable covers, helping prevent sores during extended sitting.
-
Adjustability: Some bariatric wheelchairs allow customization of seat depth, tilt, and backrest height, enhancing spinal alignment.
Comfort equals independence—if your wheelchair fits correctly, you can remain active longer and avoid unnecessary strain.
Mobility Options for Bariatric Users
Wheelchairs are versatile, but they’re not the only mobility aid available in Ireland for bariatric users. Depending on your preferences and lifestyle, you might benefit from complementary solutions, such as:
-
Mobility Scooters (see: Mobility Scooters Ireland) – Perfect for outdoor travel or covering long distances without fatigue.
-
Heavy-Duty Rollators & Walkers – Encourage physical activity while still offering sturdy support.
-
Transfer Aids & Hoists (see: Patient Hoists) – Help with safe movement between bed, chair, or vehicle.
Exploring multiple solutions ensures you can cover both short household movement and long-distance travel.
Safety Features of Bariatric Wheelchairs
Safety is at the core of bariatric wheelchair design. Look for these essential features:
-
Robust Braking Systems – Easy-to-operate brakes for slopes or quick stops.
-
Anti-tip Bars – Stabilises against backward falls.
-
Extra-wide Armrests – Support when transferring in and out of the chair.
-
Puncture-proof tyres – Minimize maintenance and reduce the risk of being stranded outdoors.
These make travel safer, whether you’re at a shopping centre in Limerick or visiting family in rural towns.
Maintenance Tips for Bariatric Wheelchairs
Maintaining your wheelchair extends its lifespan and safety. Recommended care includes:
-
Daily Wipe Down: After outdoor use, clean frame and coverings.
-
Weekly Checks: Look for bolts loosening from movement vibrations.
-
Monthly Inspection: Tyres, brakes, bearings, and cushions should all be tested.
-
Professional Servicing: At least once annually by a specialist—similar to a car service.
For accessories and parts, you may refer to suppliers of wheelchair accessories (see: Wheelchair Accessories in Ireland).
Role of Bariatric Wheelchairs in Rehabilitation
Bariatric wheelchairs aren’t just transport tools—they’re vital in medical rehabilitation. Patients recovering from surgery, illness, or long periods of immobility often need a chair that:
-
Encourages movement during therapy.
-
Provides safe transfer options for physiotherapy.
-
Helps maintain dignity during recovery when independence is valued.
For hospital discharges, having a custom-fitted bariatric wheelchair helps patients reintegrate into their homes safely, facilitating quicker physical and emotional recovery.
Accessibility and Transport in Ireland
Ireland continues to improve infrastructure for accessibility. For bariatric users, paying attention to public transport and building access is crucial.
-
Public Transport: Many Dublin Bus and Irish Rail services include ramp access and priority wheelchair zones. However, bariatric chairs may need pre-check to guarantee sizing compatibility.
-
Wheelchair Infrastructure: Modern public building codes require doorways, ramps, and accessible restrooms that accommodate larger frames.
-
Compliance Regulations: Under Irish and EU law, ensuring inclusive travel systems is mandatory—though barriers still exist, particularly in rural areas.
When selecting a bariatric wheelchair, consider portability as well, especially if taxis or private vehicles are part of daily routines.
Standard vs. Bariatric Wheelchairs: A Comparison
| Feature | Standard Wheelchair | Bariatric Wheelchair |
|---|---|---|
| Weight Capacity | 250–300 lbs | 300–1,000+ lbs |
| Frame Strength | Lightweight | Reinforced heavy-duty |
| Seat Widths | 16–20 inches | 22–30+ inches |
| Durability | For occasional use | Designed for continuous, daily use |
| Customization | Limited | High (armrests, cushions, widths, etc.) |
Clearly, a bariatric wheelchair provides much greater support, stability, and adaptability for larger body types.
Real-Life Impact: Personal Stories
The benefits of bariatric wheelchairs aren’t just technical—they are life-changing. Many Irish users have reported:
-
Improved social inclusion – Being able to attend family gatherings without discomfort.
-
Boosted independence – No longer relying on constant caregiver support.
-
Renewed self-confidence – Feeling secure when traveling or participating in activities.
For instance, one Mayo resident shared that her bariatric wheelchair allowed her to rejoin weekly card games after years of absence, “bringing back a bit of my old life.”
Resources for Bariatric Wheelchair Users in Ireland
If you’re considering a bariatric wheelchair, here are some resources and support systems:
-
Irish Wheelchair Association (IWA): Provides assessments, advice, and funding guidance.
-
Local Medical Suppliers: Offer tailored product demonstrations and fittings.
-
Government Funding & Grants: Check HSE for mobility equipment schemes.
-
Community Support Groups: Sharing experiences with others fosters encouragement and helpful tips.
Frequently Asked Questions
Q: What is the average cost of bariatric wheelchairs in Ireland?
Costs range from €500 – €2,500, depending on customization, durability, and brand choice.
Q: Are rental options available?
Yes, some medical suppliers in Ireland offer rental programmes for short-term rehabilitation use.
Q: Do health insurance providers cover bariatric chairs?
Some private insurance companies may cover part of the cost; always confirm with your provider.
Q: Can I receive government assistance?
Yes, the HSE and certain disability programs offer grants for essential mobility aids.
Conclusion: Restoring Independence with Bariatric Wheelchairs
Bariatric wheelchairs represent more than just mobility aids—they are empowerment tools. They provide independence, comfort, and safety for individuals across Ireland, ensuring you can continue engaging in life, work, and community without unnecessary limitations.
From wider seats and reinforced frames to custom cushions and advanced safety features, these wheelchairs are thoughtfully crafted to meet every unique need. Whether you’re navigating the streets of Dublin, boarding public transport in Galway, or simply enjoying time at home, choosing the right bariatric wheelchair helps you live life with confidence.
👉 If you or a loved one are considering a bariatric wheelchair in Ireland, now is the perfect time to explore your options. Contact Irish Stairlifts & Bathrooms today for expert guidance, product recommendations, and customized solutions that restore your freedom and independence.
Take the First Step to Independence
Trusted Mobility & Grant Experts Since 1999
Book Your Free Home AssessmentISB Mobility Showroom – Clane
Unit C5/C6 Clane Business Park
Kilcock Road, Clane, Co. Kildare
Eircode: W91 NF86
045 892 696 | 0818 818 500
showroom@irishstairlifts.ie
Mon–Thu: 9am–5pm | Fri: 9am–4pm